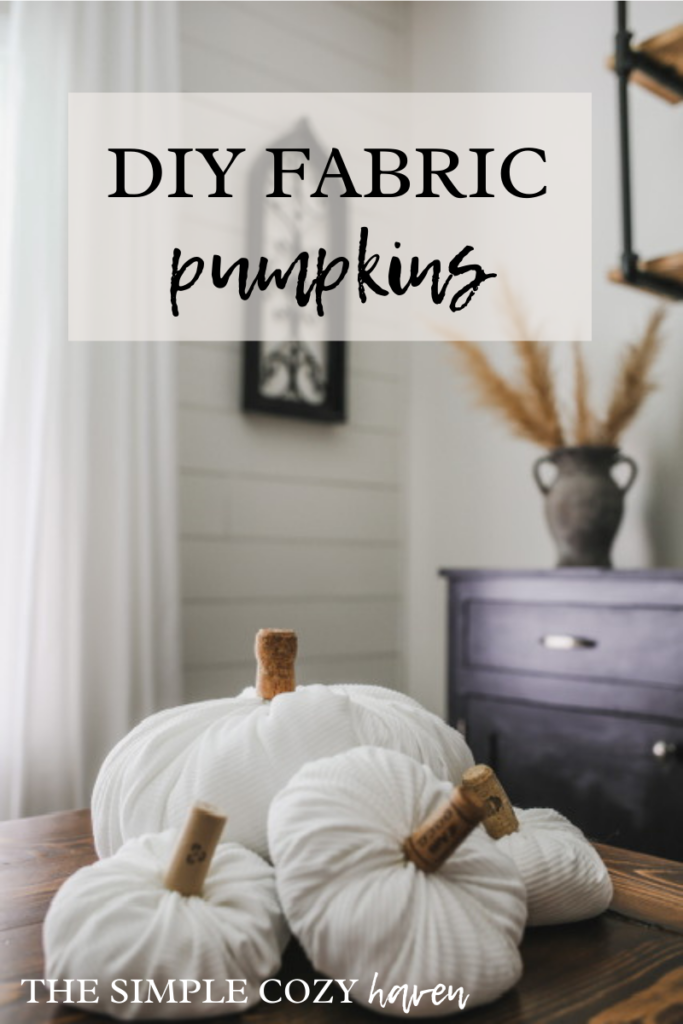
How To: Easy DIY Fabric Pumpkins
Hey y’all! Today I am going to be showing you how you can make your own easy DIY fabric pumpkins! This is a super simple project even the novice sewer can take on. Trust me – I am very much so a novice sewer, but I’m working on it!
It’s officially fall and this weekend our temps are supposed to be in the low 60s at night! So it’s time to break out the pumpkin spice! Enjoy this tutorial, friends!
DIY Fabric Pumpkins
I wanted to add some thrifty decor to my current fall stash, but with now 3 boys on the loose – I needed something that could NOT BE BROKEN! Ha!
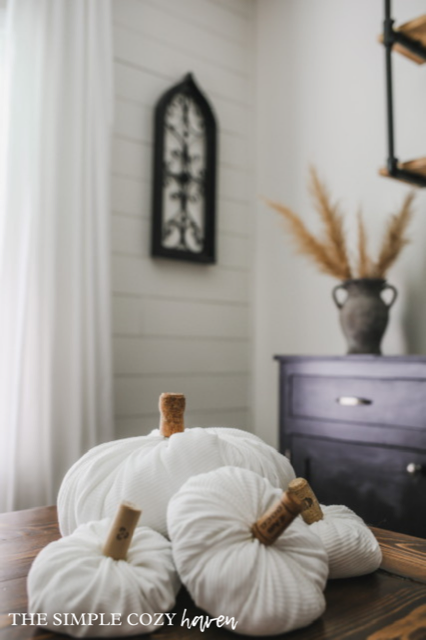
Every antique shop I’ve been to lately has these sweet little fabric pumpkins on display and I knew I could recreate that for a fraction of the price.
You could do this entire project for free if you had some leftover fabric from another project or even some older linens that you were going to donate anyways.
I got my fabric at Hobby Lobby because I didn’t have anything on hand but I was able to make 4 (and counting) pumpkins out of 1 yard of fabric! And it only cost me $5!!
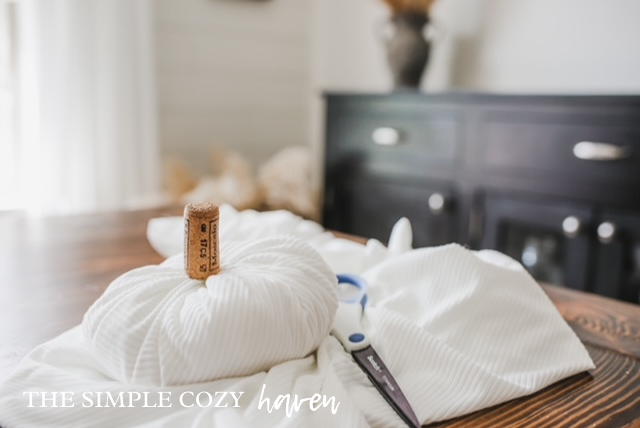
Materials
- Fabric
- Needle and Thread
- Scissors
- Plate or something round to trace
- Pen
- Rice
- Polyfill
- Some sort of glue – I used a multipurpose craft glue
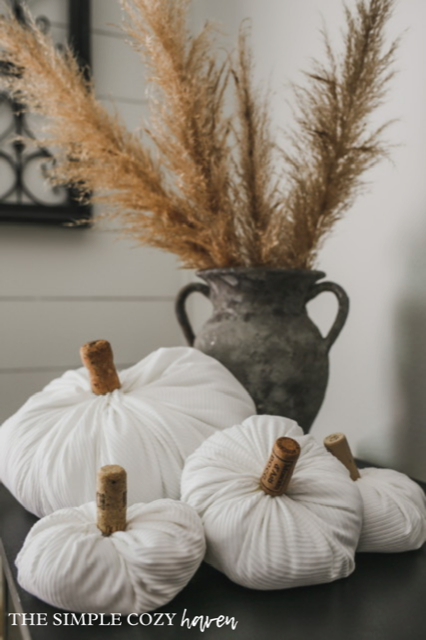
- Wine bottle corks
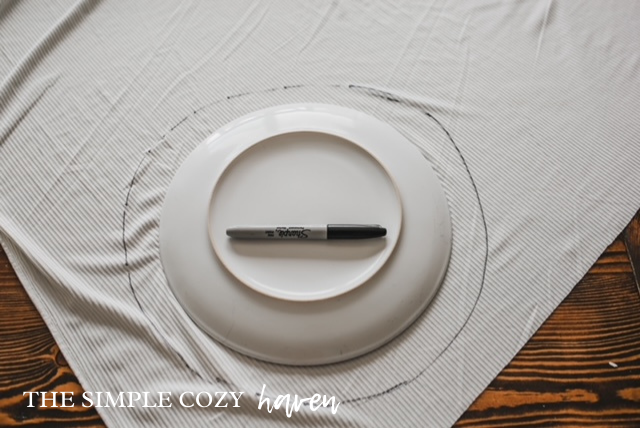
Step One:
Lay your fabric of choice out on a table and trace your round object. I traced mine about an inch bigger just to make sure my pumpkin would be a good size.
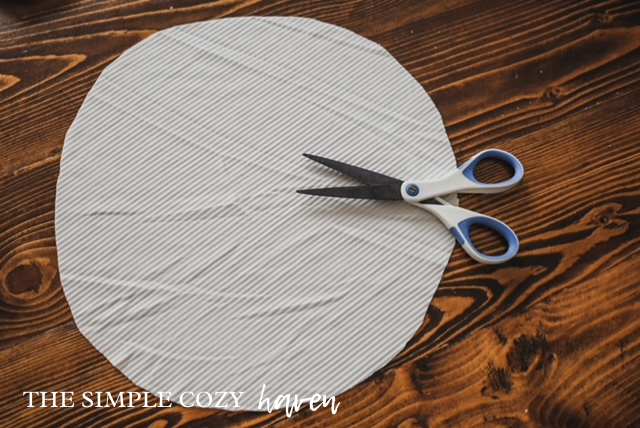
Step Two:
Cut out the circles of fabric. It’s okay if they aren’t perfect, mine definitely weren’t!
Step Three:
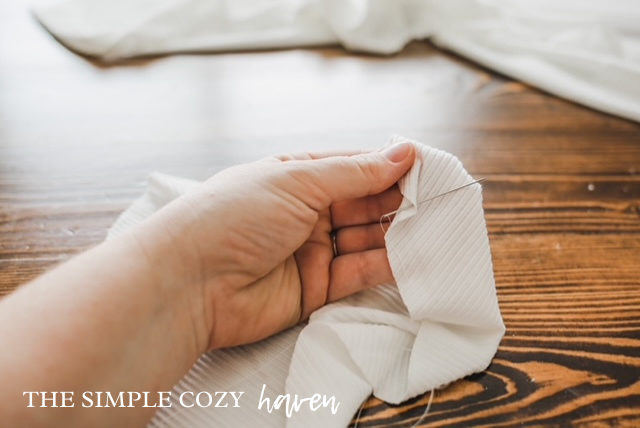
Thread your needle and put a knot at the end of the thread. I started from the inside of the pumpkin that way my knot would be hidden. Stitch a line about 1/4″ away from the edge of your fabric. I would space my stitches about an inch away on my smaller pumpkins and 2 inches on the larger ones. If you pull your thread tight your fabric should gather together.


Step Four:
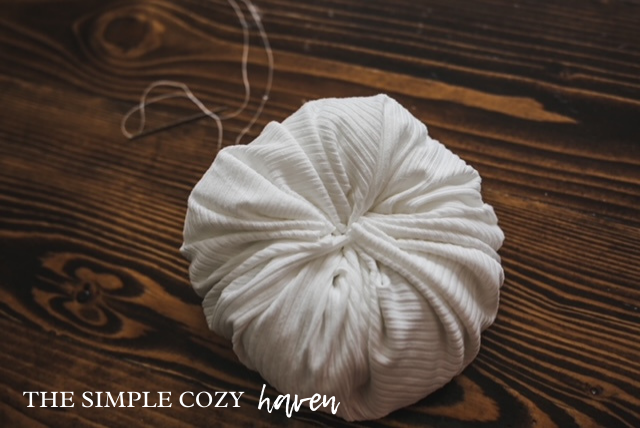
Once you have stitched a line around your entire circle, fill the bottom of the pumpkin with some rice. This gives your pumpkin some shape and a true ‘bottom’ to sit on. I used about 1/4 cup in each pumpkin. After that fill your pumpkin with some polyfill. Play around with the shape and stuff until you are happy with how it looks.
Step Five:
Once you are happy with how your pumpkin looks, stitch the opening closed. You could even put a stitch through the bottom of the pumpkin to give it a tufted look.
Step Six:
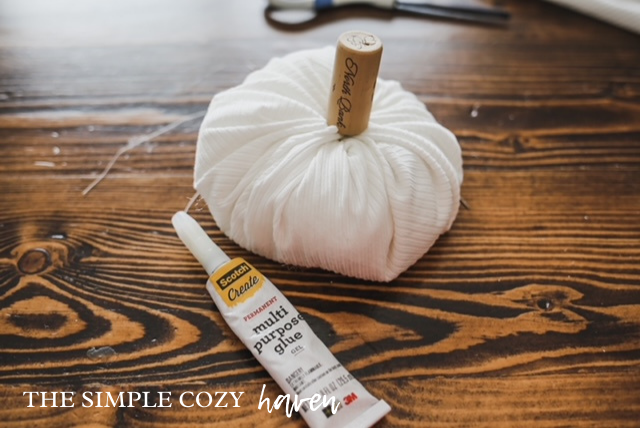
Time to attach your “stem”! I used some wine corks because I have an abundance of them! I used a multipurpose glue but you could totally use hot glue – I just couldn’t find my extra sticks of glue when I was doing this! LOL!
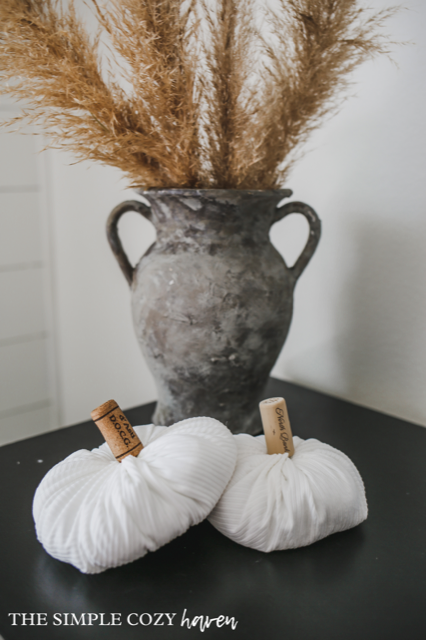
VOILA! You just made an adorable fabric pumpkin!
Let me know what y’all think and if you make your own, be sure to tag me on Instagram @thesimplecozyhaven
I hope you all have a wonderful weekend and are enjoying this beautiful weather!